You'd think a world-halting pandemic (complete with a furloughed husband) would mean I would crank out all the blog posts, and yet, here's the first in three months. This is mostly due to the fact that this nonessential hobby of mine has fallen to the bottom of our to-do lists to make room for more pressing items. That said, I do still consider this blog an important documentation of our lives, so want to share both a surprise short-term project, as well as a planned long-term project with you.
First, the short-term one, because if you don't make it to the end of alllll these pics, you at least need to see this. We had always talked about putting in a play set/swing set/whatever you want to call it. We'd considered building our own, finding one on Craigslist, or buying a kit, but didn't really have a plan for "when." Enter: some free turf my brother hooked us up with from the demo of the KSU practice field and a free play set listing on Facebook shared by a friend. With some generous, capable help, Bryant laid the turf in our yard and tore down and hauled the play set to our house. Unfortunately, it wasn't as salvageable as advertised, and in the end, the only usable pieces were the slide, swings, a couple anchors, and a tunnel (which we didn't end up using, at all). It was still (monetarily) worth the trip for these - just a bummer that we'd be starting from scratch when we'd planned to only replace a few boards.
So, we put our heads together, and Bryant put his design software skills to work, to design a play set on our own. The dilemma then became whether or not to actually go ahead and build (pay for) it. At this point, we didn't know what the employment future held (was a month-long furlough that ended up becoming a lay-off, unbeknownst to us, at the time). We did know, however, that (likely) never again would Bryant have so much free time to complete a project like this. We also knew Jacob would love it, and it would come in extra handy when trying to keep him entertained at home while caring for a newborn. After lots of prayerful consideration, we decided to go for it, and in about two weeks, it was done! The end result is truly amazing, to me - Bryant did such good (and fast) work - and we like to say it's already paid for itself in joy and entertainment. I'll let the pictures provide further explanation:
 |
New and salvaged materials.
|
 |
This is as close to a "before" of the space as I got.
|
 |
Still amazes me he did all this by himself.
|
 |
A couple components required a second, non-pregnant pair of hands.
|
 |
♥
|
 |
Roof complete!
Notice their supervisor in the slide on the left...
|
 |
Maiden voyage on the swing...
|
 |
...and then, the slide.
Did I mention it's already paid for itself in pure joy? |
 |
There was really no keeping him off it, even while the finishing touches were being completed.
|
 |
Ta-da!
(Notice the pile of old play set in the background. Thankful for neighborhood dumpster day (and super helpful neighbors!) to be able to dispose of it.) |
 |
Only remaining "final touches" are some handle bars/rails from the old set that will be repainted and added to the sides and top of the the ladder.
|
 |
Ready to "take your order" anytime!
|
And now for the long-term project. This is something I've been waiting to post an update about for over a year, now. I was planning to post before some finishing touches, but then life got in the way, so now, I get to post about the fully-completed project!
You may remember a couple previous posts about our basement (
this one and
this one, to name a couple). It's been a work in progress since we moved in. The initial main objective was to make sure it stayed
dry in any amount of rain, which involved a ton of inside and outside work, done both by us and professionals. Once we felt settled in that respect and were able to comfortably spend more time down there, we realized we actually
weren't that comfortable (in the wintertime), because it was so terribly cold. Upon some further inspection, we realized there was
very little effective insulation on the outside wall. We'd planned to redo/renovate the space, at some point, for more aesthetic reasons, but as with
most projects, a newfound necessity (warm, efficient space) moved this to the
top of our list.
As always, I'm so grateful for my handy husband. He's put so much blood, sweat, and tears (though I think those are all on my end) into making our home the best it can be. It always amazes me how willing he is to tackle a project he has no previous experience with and how well he's able to learn and figure things out on the spot. We are also so grateful to my parents for helping make all this possible on so many levels - from hard labor to childcare, and so much more - they are just so generous, and we are thankful. The result, in this case, is a finished basement that is comfortable, usable, and beautiful. And what wonderful, wonderful feeling to have it truly done, now!
Rather than before/after shots of each room, I'm going to share these in chronological order to give you an idea of the process(es) (and to document it for our own posterity's sake). I apologize for the amount of scrolling you'll have to do to get a true before/after idea...but appreciate anyone who is interested enough to do so!
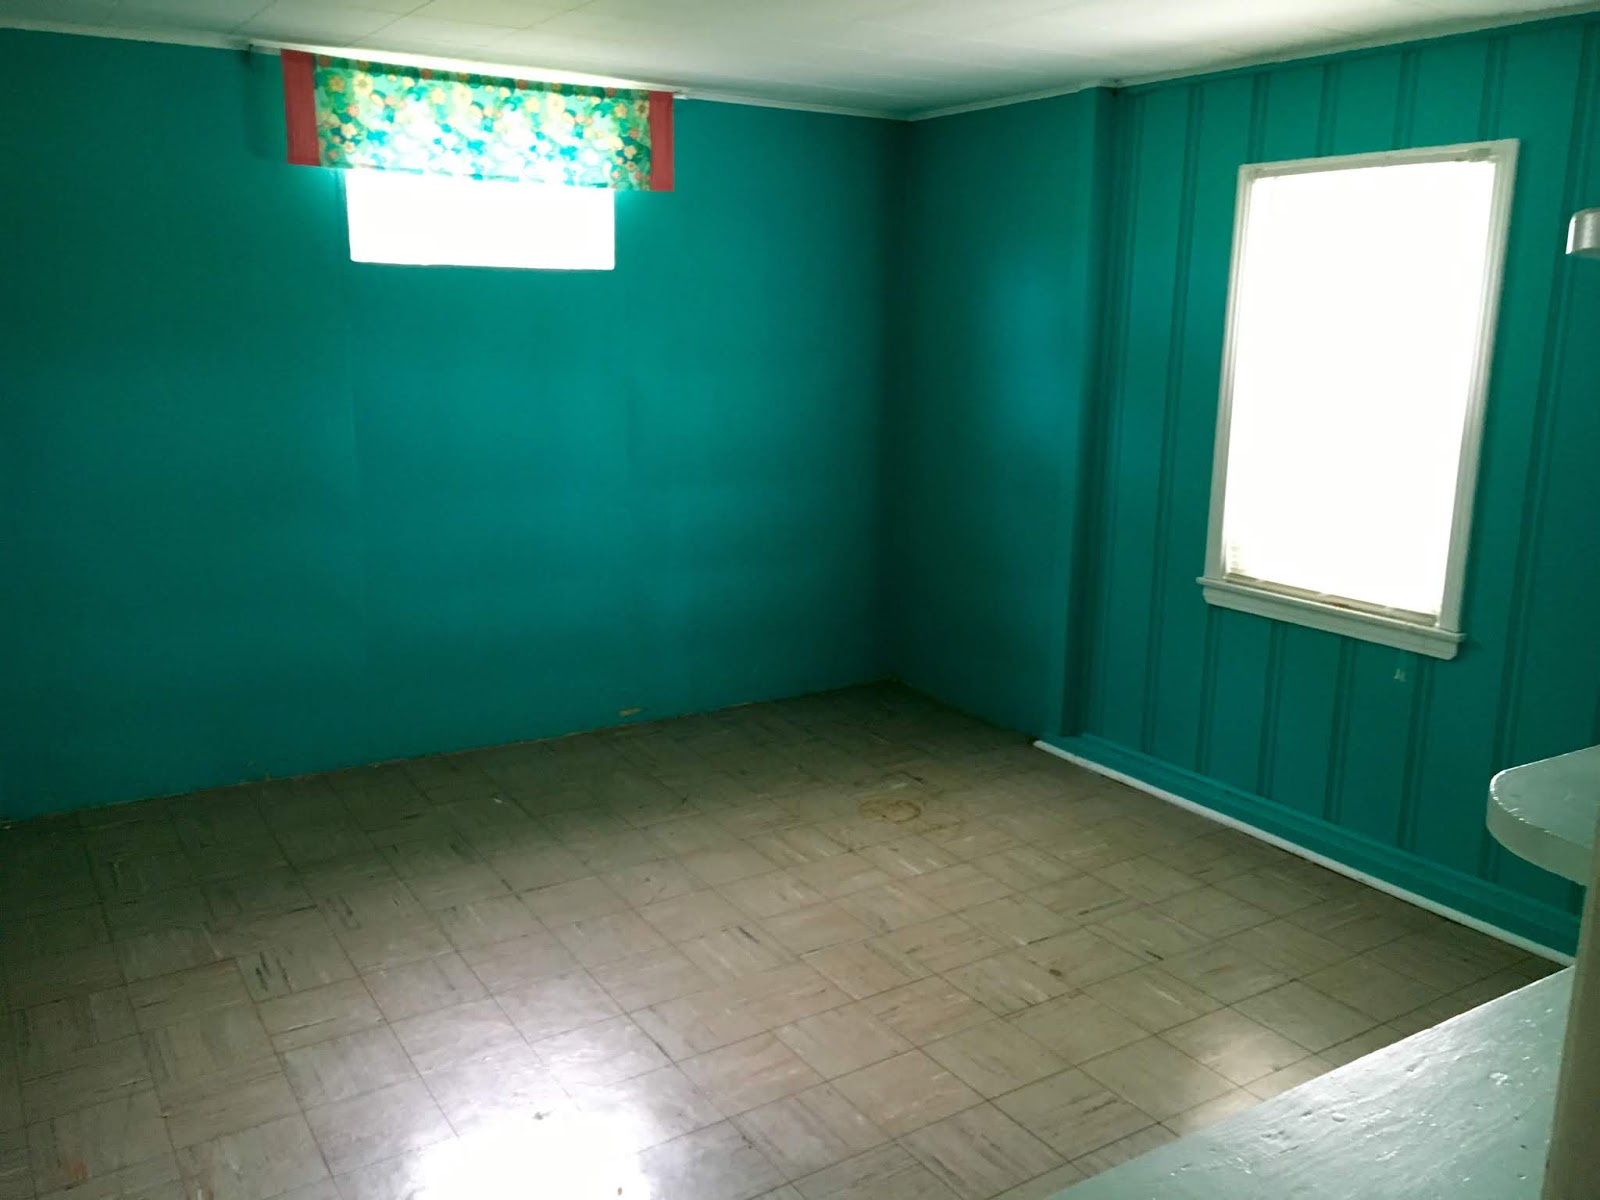
This group of pictures is from the original "for sale" listing. Look at all of that carpet!
These pictures are from the day (or maybe day after) we moved in. The carpet and pad were
soaked back to the poles (it rained all day that day), and we found that (insert whatever adjective suits you here) tile underneath.
The tile was old and likely hazardous (asbestos), so we had it professionally removed. It was everywhere...
Then, Bryant epoxied the
entire basement cement floor. Writing only one sentence about this incredibly lengthy and taxing project just didn't seem
sufficient, so here's another.
 |
At this point, it felt so good to get all the furniture in place!
|
Next project was rebuilding the stairs. Bryant designed these (himself!) to be less steep and narrow, and they turned out
great! We got the carpet on the cheap as a remnant from a carpet place less than a mile from us!
Even after Bryant, my dad, and my brother put in drain tile
outside of the house, water was still finding its way in, so we had to have someone come put more drain tile in on the
inside. This also meant Bryant's beautifully epoxied floor was partially torn up. (It ALSO meant there was concrete dust
literally all over the house.)
 |
Sanding the new concrete to before epoxying it...and containing the dust (unlike the professionals).
|
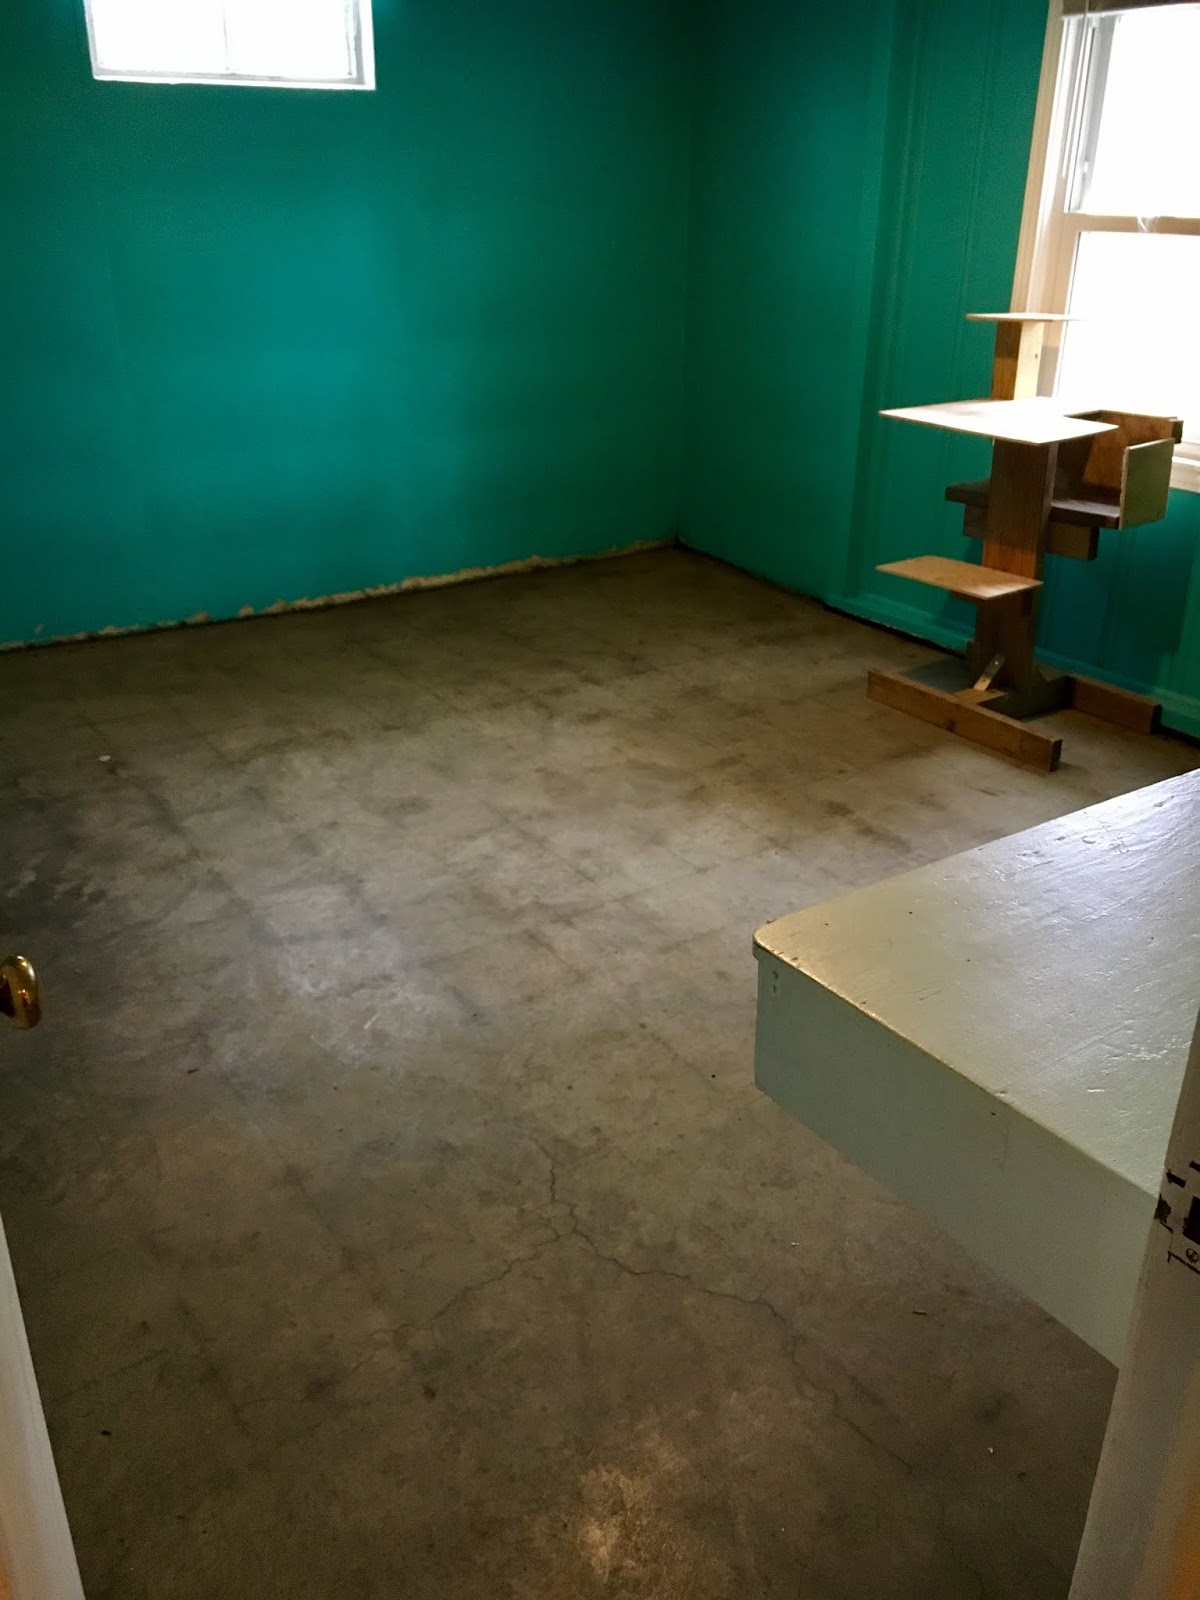
So, here we are at the "dry but cold" basement stage. In a nutshell, the the remedy involved demo, insulation, and drywall. Then, there was paint, and finally, decor! Lots and lots of clean-up in between, of course. I didn't go back to get time-stamps on these pictures, but from first demo to last decoration, this process took almost exactly one year.
 |
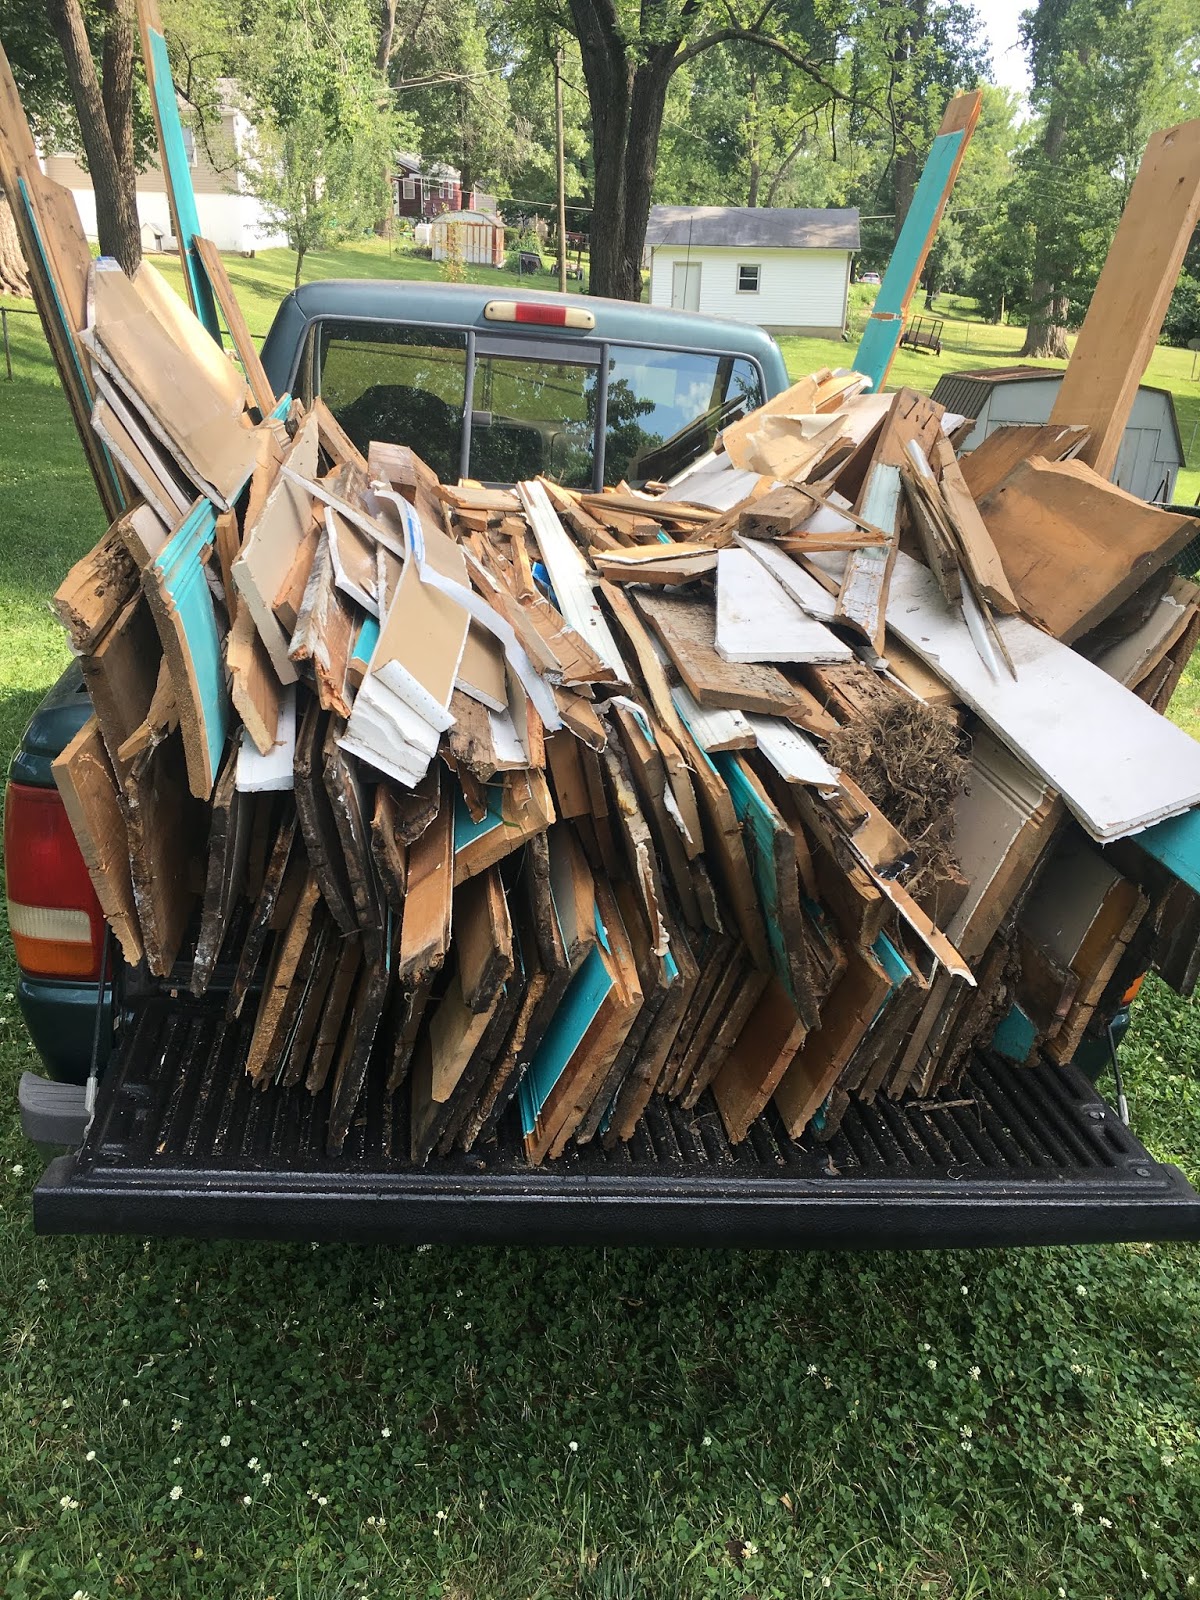
New windows in and paneling off.
|
 |
Just in time for dumpster day - phew!
|
 |
Insulation: check!
|
 |
Lots and lots of drywall.
|
 |
| (This is the guest/craft room that used to be teal and had a wall of built-in desk/dresser space.) |
 |
| Fresh primer! |
 |
One room painted!
|
 |
This was the first one done, so we could entertain guests even while the project was underway.
|
 |
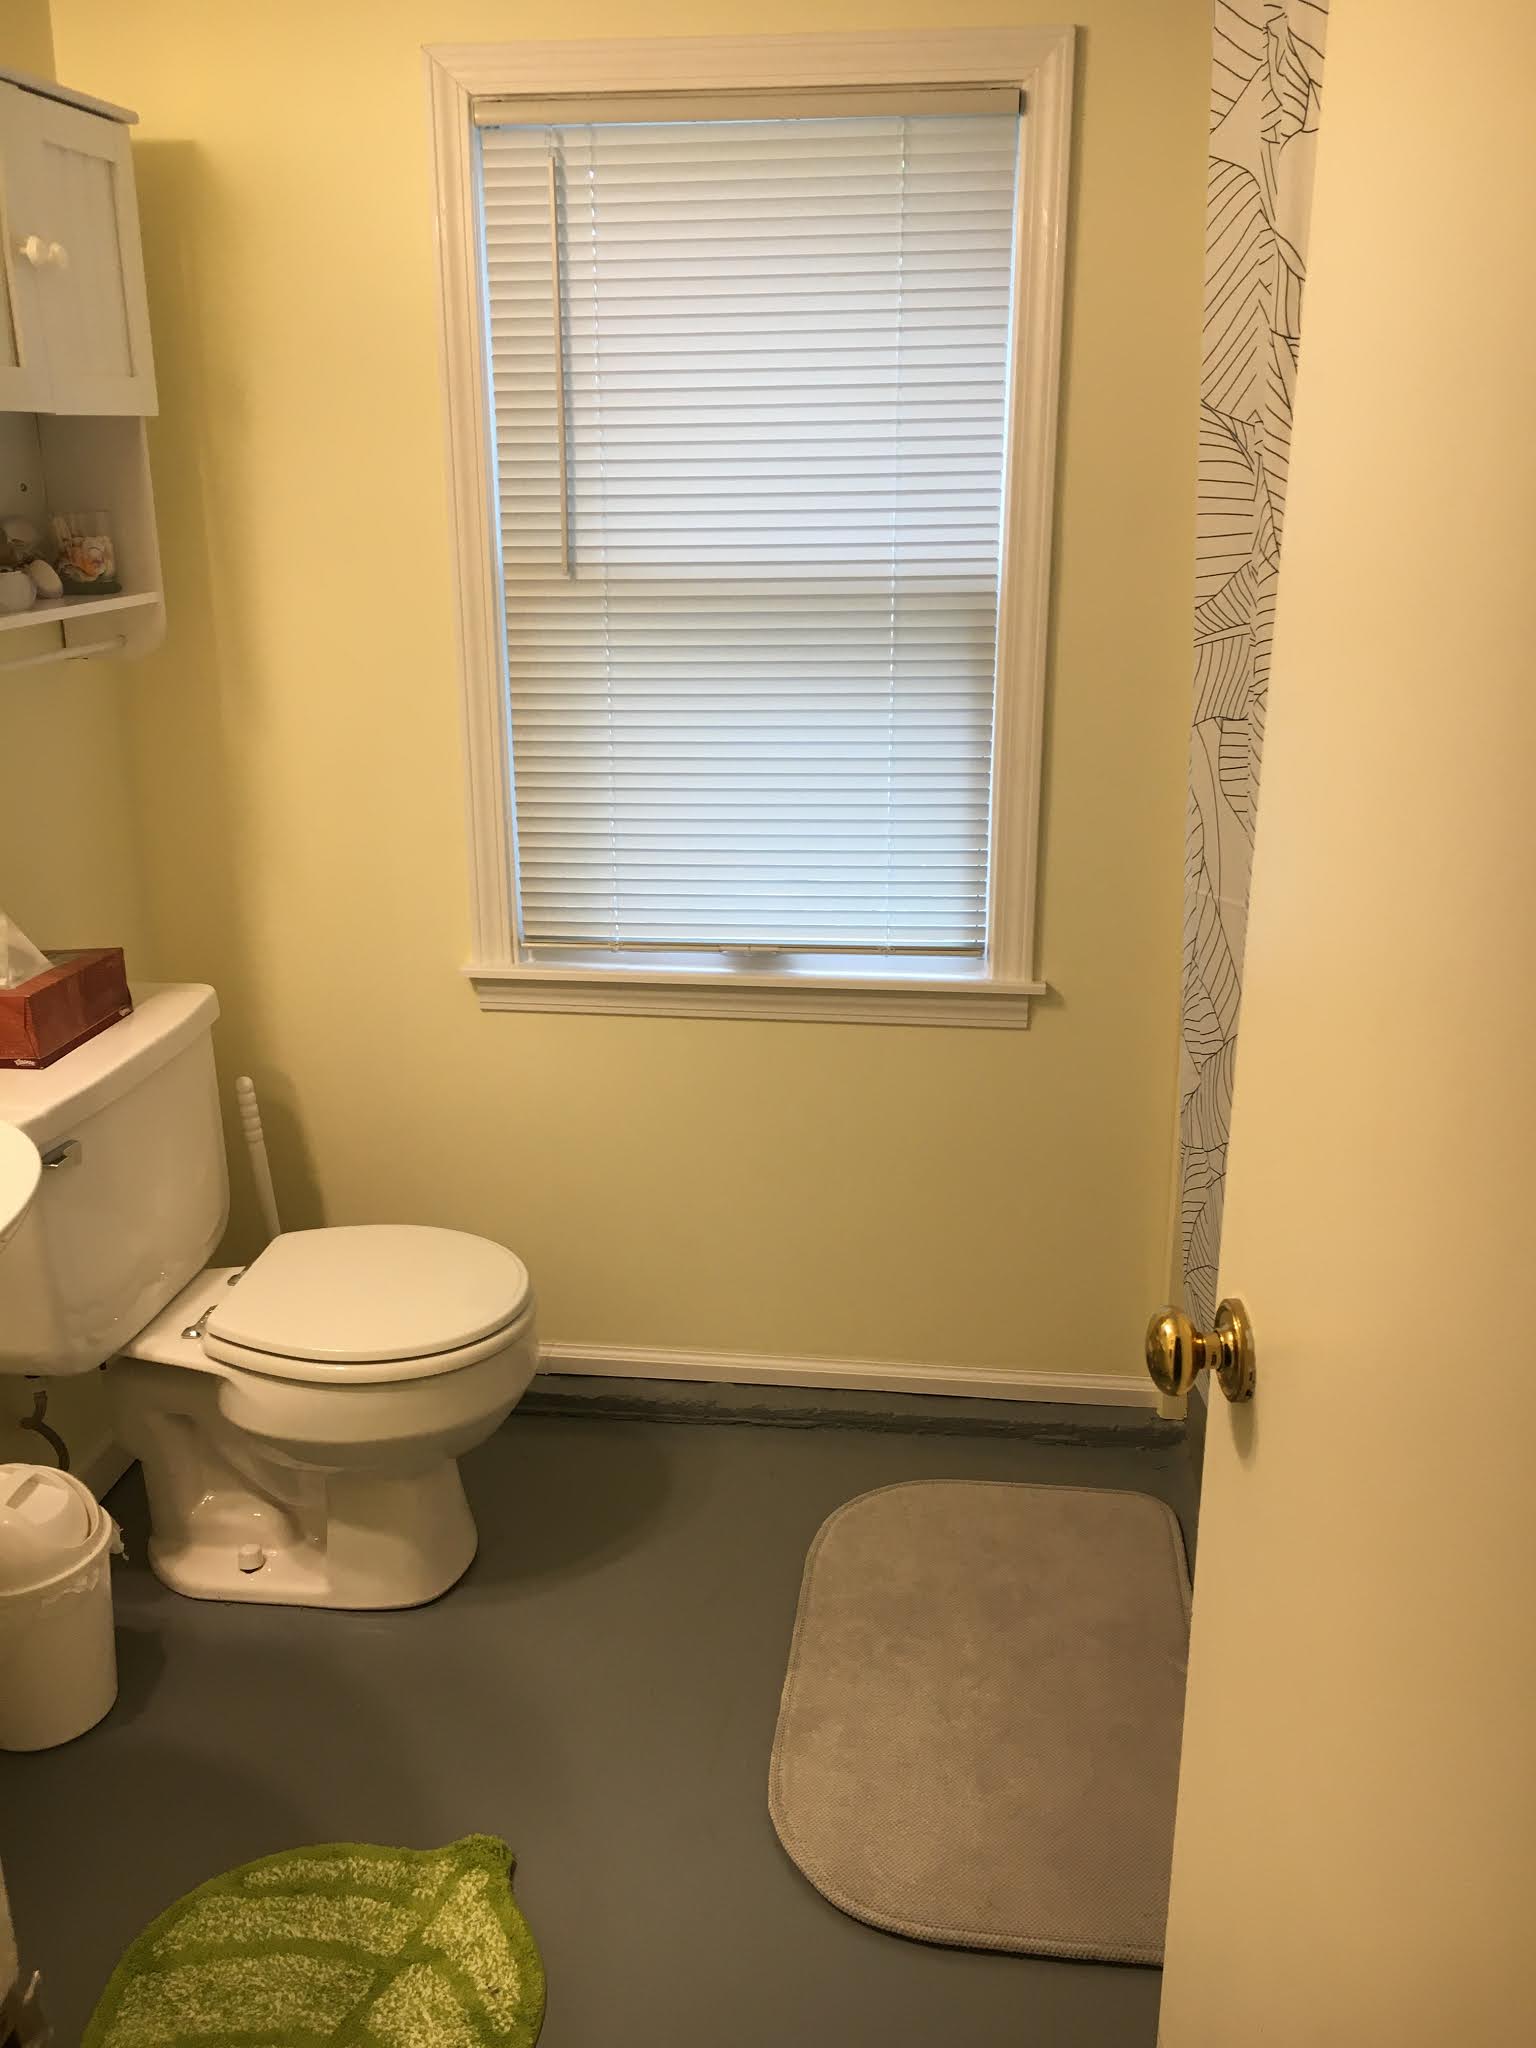
Trim and new rugs...
|
 |
...and shower curtain (even though we couldn't use the shower for several months after this)!
|
 |
They build that ladder-step-cover-thing out of scraps.
|
 |
Yes, I was nervous about this.
|
 |
But goodness - look how it paid off!
We'd picked out the light fixture a little while before this (the bulbs sort-of look like milk bottles and tie in well with the Mason jar fixtures Bryant made for the kitchen lights), and I knew I wanted something great for the wall, but couldn't put my finger on just what it might be. Found this piece at a thrift store on my birthday last year and knew it was just what I didn't know what I was looking for. Just gave it a fresh coat of paint, and I still can't believe how much I love the space. |
 |
Window treatment and decor up.
Really, really love how the piano nook, in particular, turned out. You can't really tell in the picture, but there are sheer white curtains behind the red, light-blocking ones, so we have lots of lighting options...and it looks pretty! |
 |
Window treatment up.
|
 |
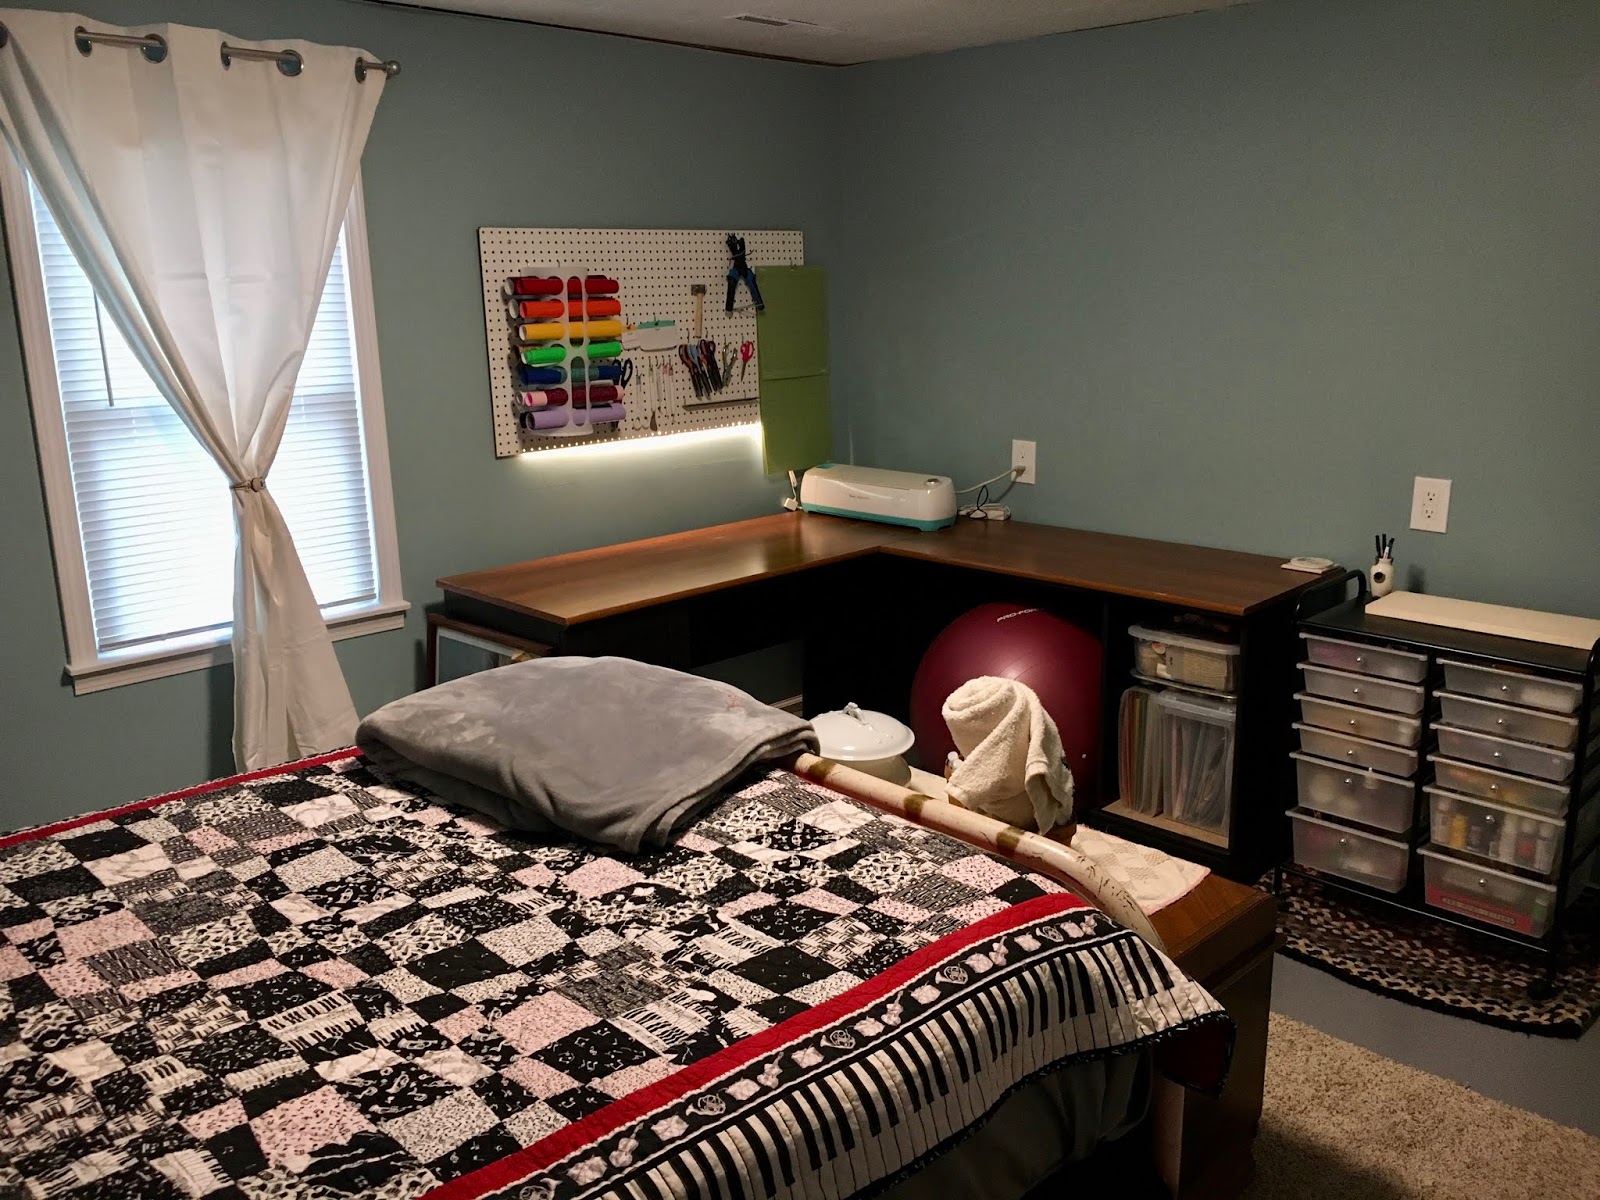
Craft corner complete - this is what dreams are made of!
(Bryant found this desk for FREE on Craigslist, and it's so perfect!)
 | New slipcover for the couch (because the leather was disintegrating, but the couch was still functional/comfortable).
|
|
 |
Shower floor sanded, re-painted, and caulked.
(This was a much more involved process than you might think (and than anticipated). So thankful for a husband willing to start and stick with a project.) |
 |
Shelves and decor up!
These were the final touch on the whole project, and it was kind-of surreal to realize it was all DONE! |
If you made it this far, bless you. Thank you for taking an interest in our lives, and therefore, our home improvement projects. Really and truly - many of you have provided help, muscle, support, and encouragement along the way, and we're so appreciative!
With a contented sigh,
Kensy
Favorites of the day:
 |
Our growing garden!
Not-pictured: my great helpers, the tiniest of which is now an expert at spotting red tomatoes and continues to verbally affirm/encourage the baby watermelons. |
 |
Speaking of that tiny helper...he was more excited than I was to sort/organize lids and containers, saying, "I love doing this with you! This is fun. It's like a party!"
|
 |
Sweet kitten snuggles (no, she's not ours)
|


